Using Junos Pulse to connect Dynamic VPN client to SRX
Steps to connect Dynamic VPN client to SRX using Junos Pulse
Note: This article will be updated regularly with new findings. Please check back for updates or click ‘subscribe’ at the top of the article to get notifications.
Instructions for the SRX and client are as follows:
SRX
Follow the steps in the Dynamic VPN Application Note to configure the SRX device. The steps specified in the ‘Configuration’ section of the application note do not change if you are using the Junos Pulse client:
1. Access configuration
2. HTTPS configuration
3. IKE/IPsec configuration
4. Dynamic VPN configuration
5. Policy configuration
CLIENT (Junos Pulse)
Follow the sequence of events below in order to establish an IPsec tunnel using Junos Pulse. Instead of the PC user pointing to https://<SRX IP>/dynamic-vpn , the user performs the following steps:
1.Download Junos Pulse software from http://www.juniper.net/customers/support/products/junospulse.jsp.
Note: The EXE or MSI software for the PC is located under the ‘Bulk Installer’ section on the Junos Pulse Download Software page.
2.Install Junos Pulse on the PC.
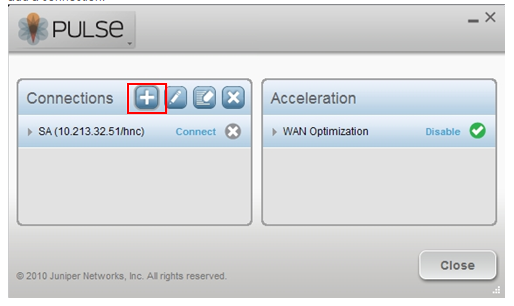
3.Launch Junos Pulse client from Start>All Programs>Juniper Networks>Junos Pulse, and click on the ‘+’ symbol to add a connection:
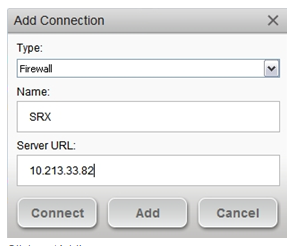
4.From the Connection Type drop down menu choose firewall, enter the name of the connection, and the IP address of the external interface of the SRX Firewall:
5.Click on ‘Add’.
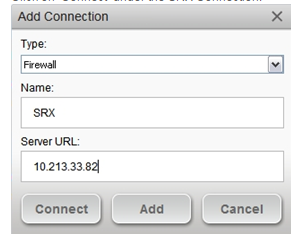
6.Click on ‘Connect’ under the SRX Connection:
7.If you are using the Self signed certificate or if the Certificate is invalid an alert message is shown, click on ‘Connect’ if you want continue:
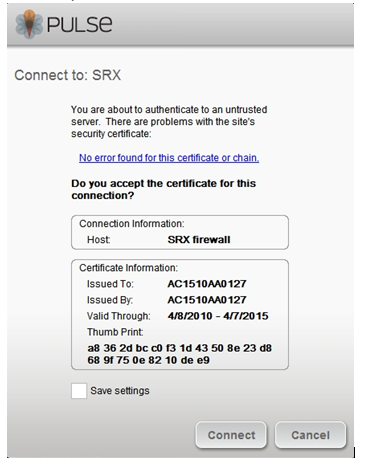
8.Enter your username and password credentials and click on ‘Connect’. At this time, the user configuration is downloaded and IKE Security Association will attempt to establish.)
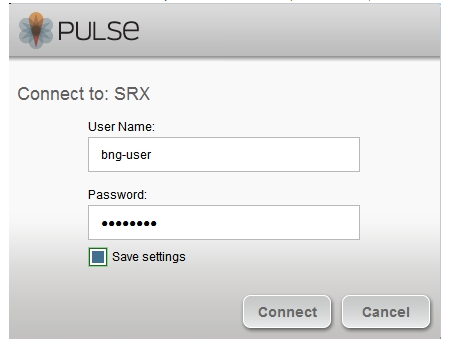
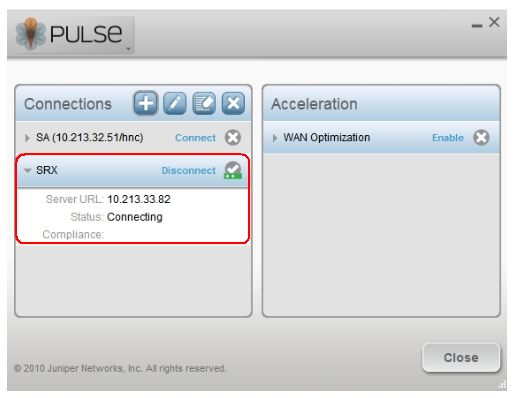
9.The Junos Pulse window shows the status as ‘Connecting’ (as shown below):
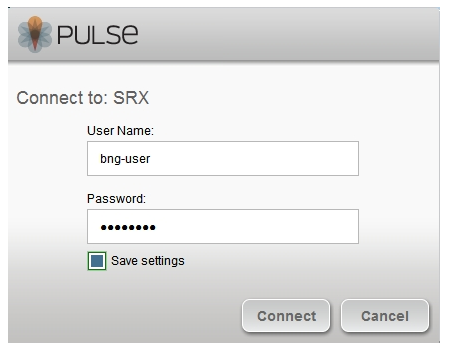
10.If you are accessing the dynamic VPN for the first time you will be prompted for User credentials again. Enter your Xauth username and password credentials.
Note: The first User Auth (at step 8) is being used to download the configuration and to establish an IKE security association. The second credentials (at this step) is used to establish IPSEC Security association and make the connection. Both the user credentials can be either same or different based on the configuration on the SRX Appliance.
11.If the user credentials are accepted then the connection is established. The status of the connection shows as ‘Connected’
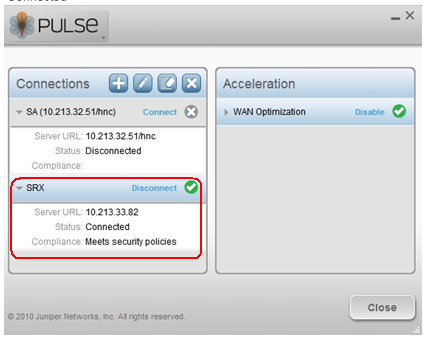
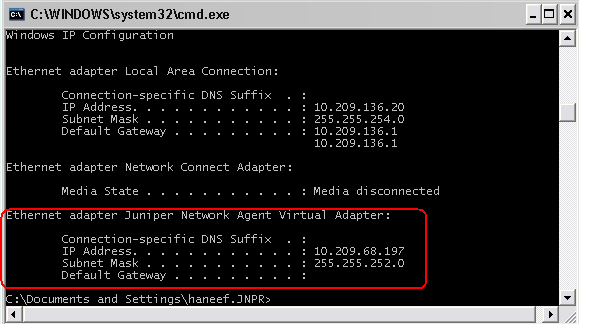
12.To verify the connection, go to command prompt and type IPCONFIG /ALL. Look for the Juniper Network Agent Virtual Adapter. This is required to successfully access protected resources. The address is assigned with the Framed-IP-Address and Framed-IP-Netmask attributes on the RADIUS server.
