Insert Checkbox in Word Document (Screenshots)
Checkboxes are a common feature in survey forms and even in hardcopy questionnaires which are meant filled manually by ticked off the choices presented. They make it easy in getting feedback in a clear and concise manner and in the shortest time possible.
In this brief guide, you will learn how to add checkboxes in Word Documents. In this guide, we are using Microsoft Word 2016 on the Windows or Mac system.
How to add checkboxes in Word using developer tools
If you intend to create an online fillable form that features or includes checkboxes, then you need to enable developer tools in the Word ribbon. To achieve this, follow the steps below
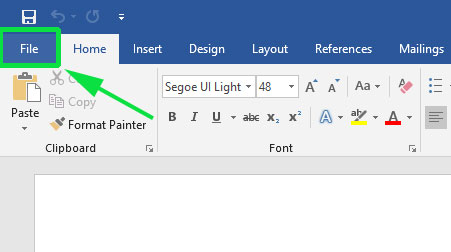
Click on the ‘File‘ tab on a blank Word document as shown:
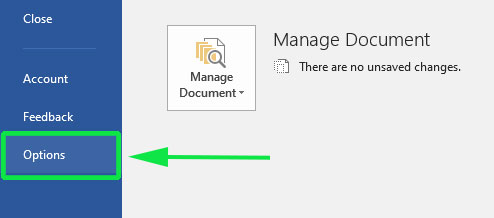
On the pull-down menu click on the ‘Options‘ menu item
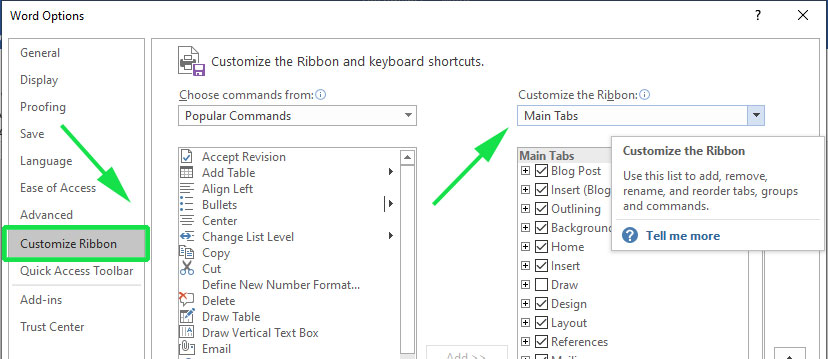
This will pop open the ‘Word Options‘ window as shown. On the left sidebar, click on ‘Customize Ribbon‘ and on the far right hand click on ‘Main Tabs‘
Still on the same window under ‘Main Tabs‘ scroll and check the ‘Developer’ checkbox and then click ‘OK‘
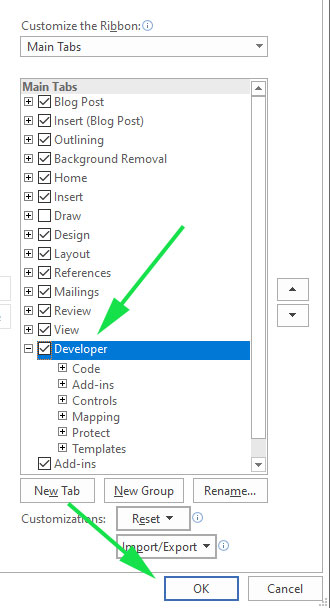
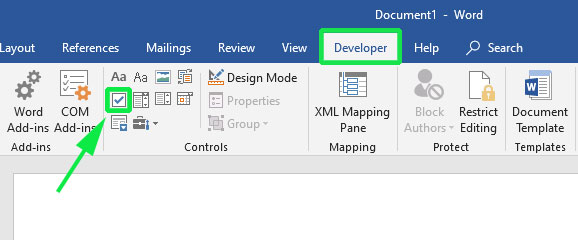
Now head over to the Ribbon on the Word document and be sure to Developer Tab as shown.

To add a checkbox, simply place your cursor where you want to place and click on the ‘Checkbox Content Control button’ on the Ribbon as shown
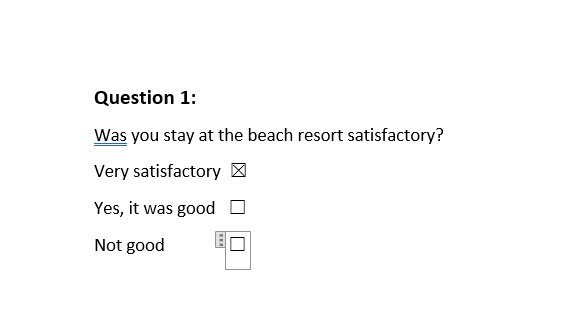
In the example below, we have placed a checklist with 3 checkboxes adjacent to 2 possible choices that a respondent might pick. I have checked the first one as you can see represented by an ‘X‘ mark and added the third checkbox for the last option.
How to add checkboxes for Printed documents using bullets
If you just want to print documents for a survey, you don’t need to stress over using the developer tools to get sorted out. Bullets come in handy in this case and all that is required is to create a simple bullet list and convert the bullets from their default characters into checkboxes.
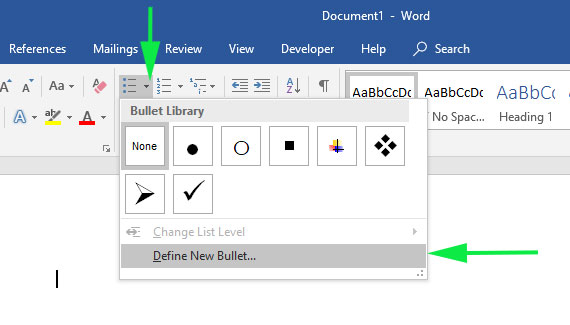
On your Word document, click on the ‘Home‘ tab and locate the bullet list icon and click on the small arrow-down button adjacent to it. On the pull-down menu, click on the ‘Define New bullet‘ option.
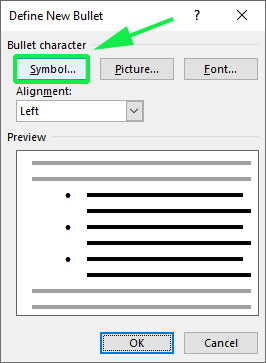
Next, click on the ‘Symbol‘ button on the ‘Define new bullet’ window.
On the next Window, be sure to click on the font window dropdown and select the ‘Windings2‘ option.
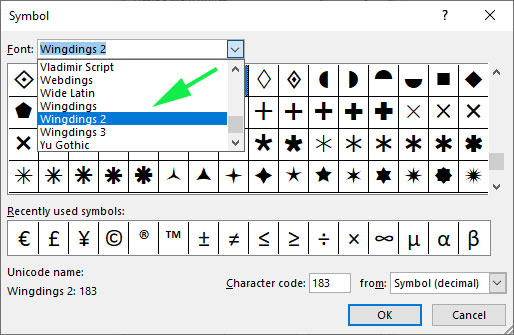
Next, scroll through the symbols and locate a symbol that closely resembles a checkbox mark. To save time, simply type 163 in the Character code textbox and hit the ‘OK’ button.
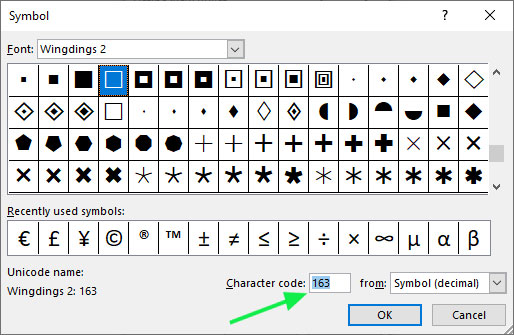
Your bulleted list will then appear as checkbox items

This method is quite handy for printed documents. However, bear in mind that the checkboxes are not interactive and cannot be used in an online survey.
Thanks for your time. We hope that this tutorial was insightful. Feel free to share and comment.