Can you schedule an email in Gmail? Yes, it is possible now. In their continuous effort to improving user’s experience of their wide array of applications, Google has once again set the bar with yet another nifty feature in its Gmail application. To make Gmail better, Google has made a recent update to their Gmail application that enables users to schedule their email.
Sounds cool right? This has eliminated reliance on other third-party applications and extensions such as Boomerang. In this short guide, you will learn how to schedule an email in Gmail.
How Scheduling Email Helps
By now, you might be probably wondering why you should schedule your emails for a later time and date. This comes with a couple of benefits.
Scheduling emails comes in handy when:
1) When you are sending an email to a person in a different time zone.
2) When it’s not convenient for the recipient to receive the message, for example at night or during the weekend
Let’s now explore the steps you need to take to enjoy this new feature.
How to Schedule Email in Gmail
Follow the steps below
- Head out to your Gmail account and click on the Compose button on the left pane as shown
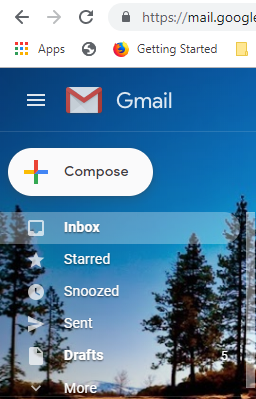
This will open a Pane where you will type in the recipient(s) followed the Email subject and the body of the email. - Once you are done typing your content, locate the Send button. Now, here is where it all goes down. Adjacent to the Send button is an arrow-down button as shown below
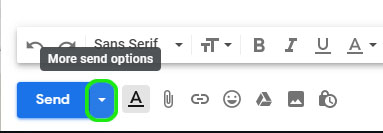
- Click on the Arrow-down button above. This will pull up a ‘Schedule Send‘ option as shown below.
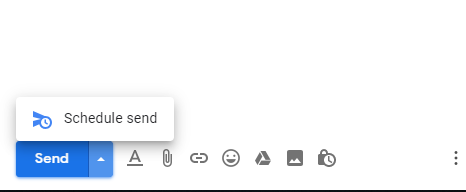
- Click on the ‘Schedule Send‘ option. This opens a ‘Schedule Send‘ pop-up which gives you default time values that you can use to schedule the sending of your email. Additionally, you can manually modify the time and date settings by clicking on the ‘Pick date and time‘ option located at the very button.
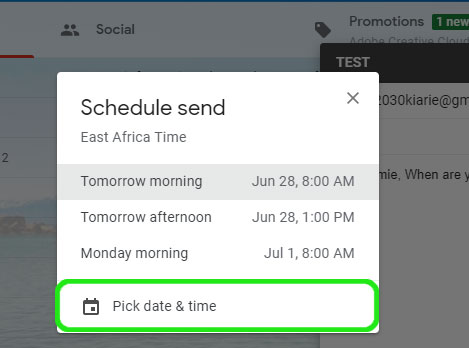
- Be sure to select your preferred date and time from the pop-up Window and hit ‘Schedule Send‘ to save the settings.

Once done, a ‘Scheduled’ tab will appear on the left pane, just below the ‘Sent‘ option showing how many emails have been scheduled.
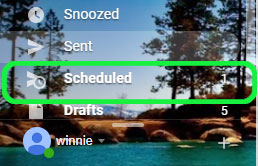
All there is to do now is sit to back and relax as you await your email to be delivered. And sure enough, your email will be successfully delivered.
If you wish to cancel the scheduled email, click on the ‘Scheduled‘ option as we previously saw above and hit the delete icon as shown.

You will thereafter get the notification below that the scheduled send has been moved to the trash and canceled.

Schedule Gmail from Mobile
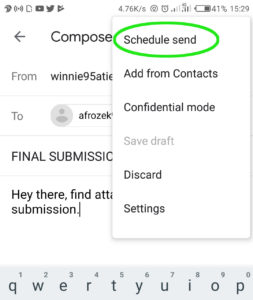
The process works exactly the same on Gmail’s Android and iOS application. The only subtle difference is that you’ll have to tap on the three dots on the Top right corner of your smartphone.

On the pull-down menu that appears, select ‘Schedule Send‘
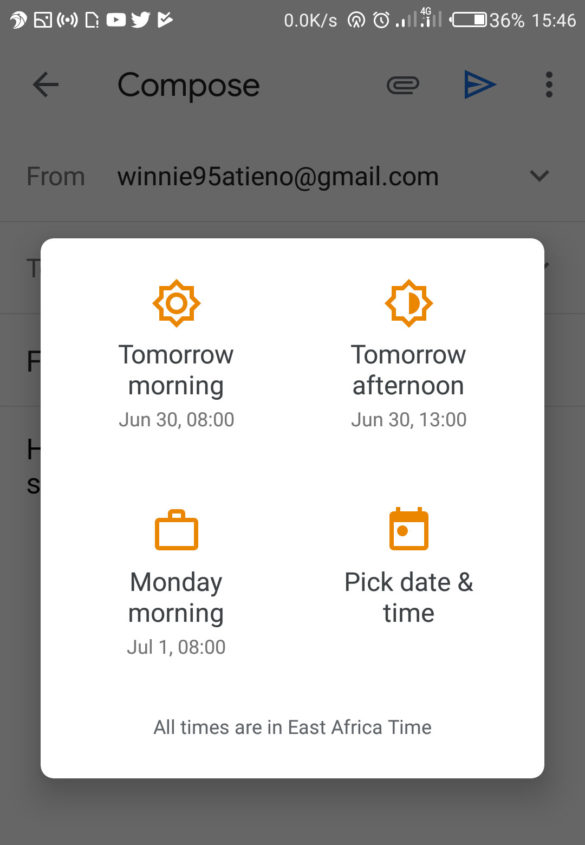
A pop-up appears with time and date options that you can use, Further, you can customize your own schedule time by clicking on the ‘Pick Time & date‘ option
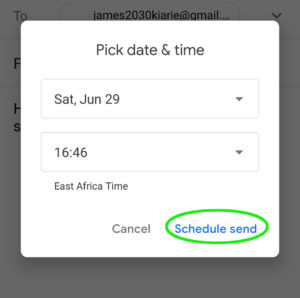
Finally, select your preferred time and date settings and hit the ‘Schedule Send‘ option.
A notification will be displayed on the screen informing you of the email scheduled for sending.
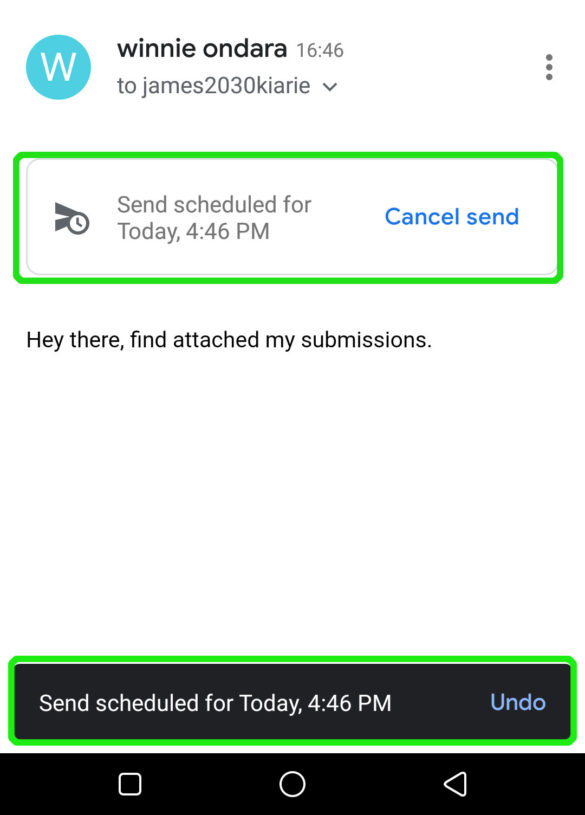
If you wish to cancel, simply click on the ‘Undo‘ button or ‘Cancel Send’ option.
This concludes our topic on scheduling an email on Gmail. Feel free to give it a shot and get back to us with your feedback.