We are often required to sign documents that are sent to us over the internet. If you are still printing the document, signing it, scanning the signed copy, and then sending it – you’re doing it wrong. Adding your own signature to a Microsoft Word document has never been easier.
There are two ways in which you can add your signature to an MS Word document. You can either add a digital signature or your actual signature in the form of a photograph.
Follow the steps below and you should be able to perform both these functions.
Inserting Digital Signature in Word
Below steps show you how to add digital signature on your word document
- Select the Signature Line
Open the document and place the cursor exactly where the signature line is to be placed and click once.

- Open the Insert Menu
Now head over to the ‘Insert’ tab on the overhead menu bar.

- Open Signature Line Options
Find the option titled ‘Text Box’, click on it and in the drop down menu select ‘Signature Line’ and then ‘Microsoft Office Signature Line’.

- Enter Signee Details
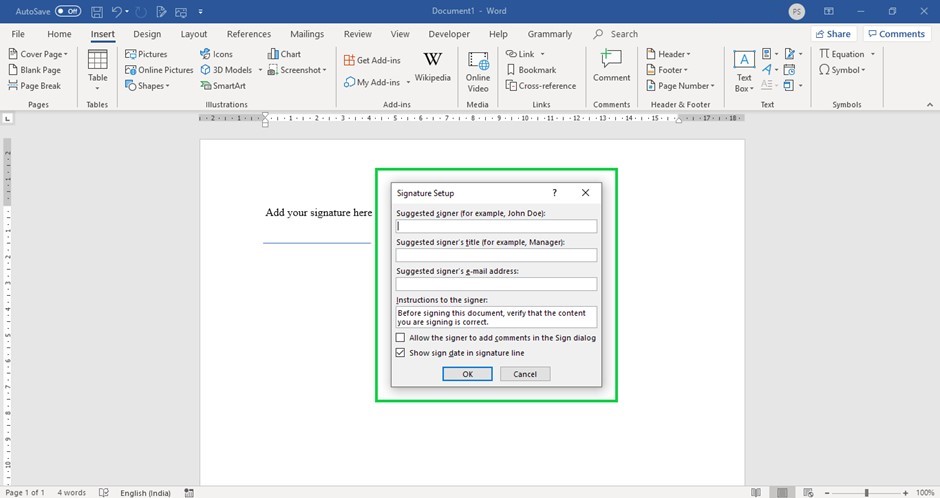
Once you have selected this option a separate dialog box will open where you can enter the details of the signee such as name, job title, email id, etc.
- Further Signature Options
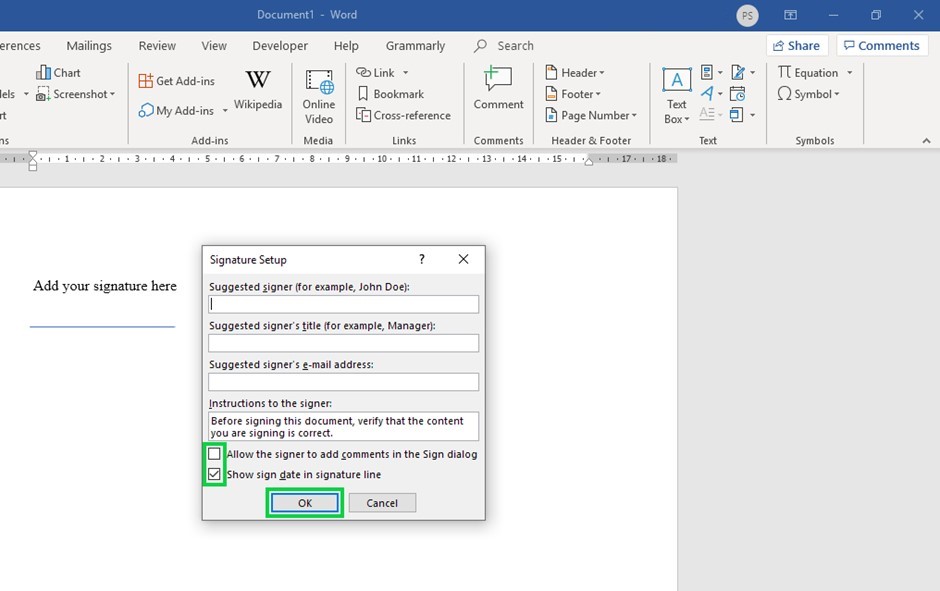
After entering your details, you may want to turn on various other options such as ‘add comments’ and ‘show sign date’. Once you are done, click on ‘ok’ and the digital signature will be saved.
- Enter your Signature
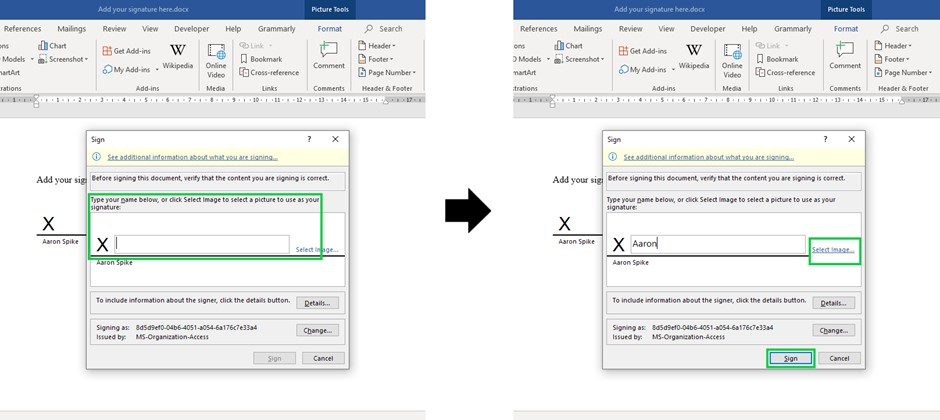
Now head over to the signature line and right click on it. You will now have an option titled ‘Sign’ clicking on which will allow you to place your signature.

- Enter Signee Name
Once you click on ‘Sign’ a dialog box will appear. Here you can type in your name and then click on the ‘sign’ button at the bottom of the dialog box. This will place your signature in the document.
Inserting Handwritten Signature in Word
Let’s see how to insert handwritten signature to your word document
-
Create your Signature File
Start by signing your full signature clearly on a piece of white paper. Now scan it using either a scanner or your smartphone scanner app and transfer the file to your PC. Remember to save it as either ‘.jpg’ or ‘.png’ formats.
- Open the Insert Menu
Open MS Word and click on the ‘Insert’ tab on the overhead menu.
- Import your Signature to the Document
Click on the ‘Pictures’ option, select insert, and in the dialog box that opens find your signature file and click the ‘insert’ button of the dialog box. This will place your signature image in the Word file.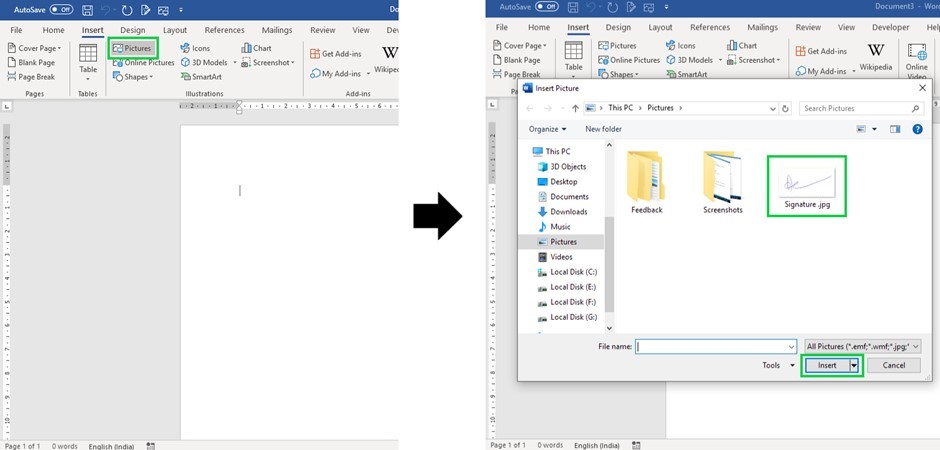
- Format your Signature
Now click on the picture and select the ‘Format’ option from the overhead menu. In the menu that opens you can find the ‘Crop’ option, use it to crop any excess white space from the image of the signature.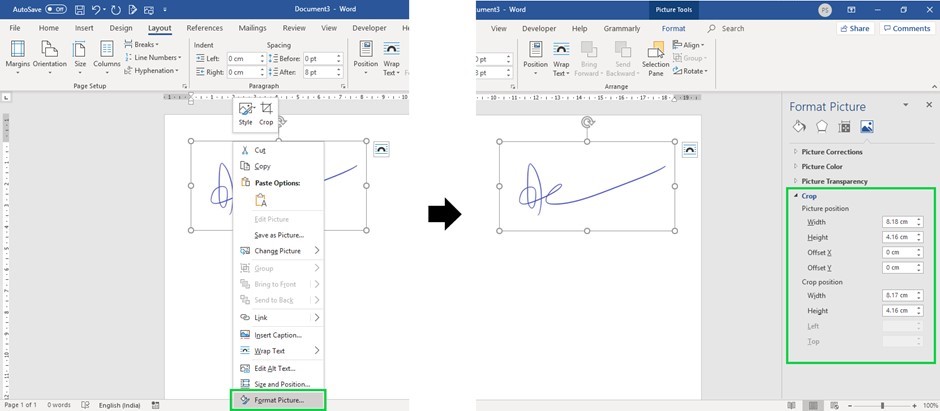
- Save Formatted Signature
Now right click on the cropped image and select the ‘Save as Picture’ option. Select the location of your choice and save this image.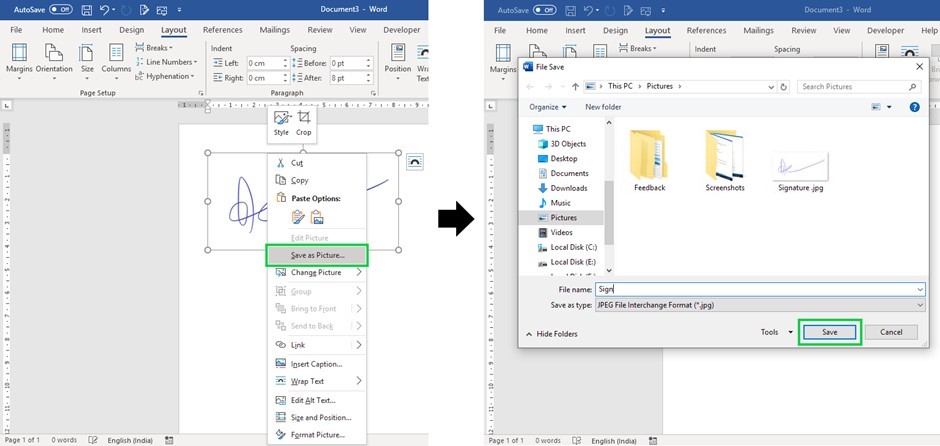
Conclusion
Use these two methods to place your signature on any MS Word document. This will not only save you effort but also a lot of time. You will be able to sign important documents immediately with a few clicks. But be careful while saving your signature in your PC especially if you allow others to use it since it may be misused.