Default Routes
Objective:
- Perform and verify routing configuration tasks for a static or default route given specific routing requirements
Static routes have proved their usefulness in situations where you want to add a network entry in a routing table when the network is reachable via a single path. This can turn into a daunting administrative task when there are a large number of networks in which you must configure static routes. This is especially true when you are connecting to your ISP because you do
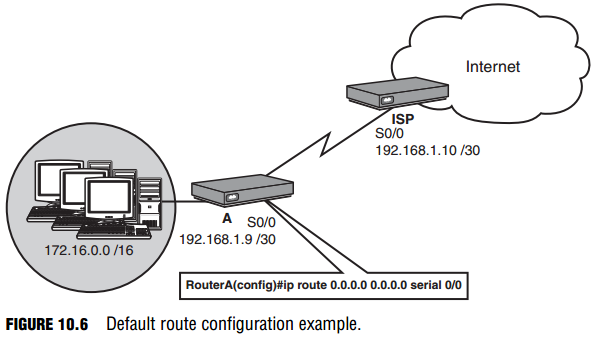
not want to configure a static route for every network on the Internet. In these situations, you might be better served using something called a default route, as illustrated in Figure 10.6. This entry is a gateway of last resort for routers in that if a destination IP address does not have a network entry in the routing table, this route is used. The syntax for a default route is similar to a static route except that the destination and subnet mask are both 0.0.0.0: Router(config)#ip route 0.0.0.0 0.0.0.0 192.168.1.10
NOTE
Again, you can specify the local interface as opposed to the next-hop IP address on a point-to-point link.
EXAM ALERT
Be sure to look closely at the wording in a question regarding a default route (gateway of last resort). When used in a router, the command is ip route 0.0.0.0 0.0.0.0; however, to configure a default route in a Layer 2 switch, it is ip default-gateway because Layer 2 switches do not have Layer 3 routing entries.
NOTE
In some situations a default route may appear dynamically in a routing table. Specifically, if you have con figured your interface to dynamically be assigned an IP address and default gateway from a DHCP server using the ip address dhcp command, the router automatically places a default route in its routing table using the default gateway as the next hop.
Configuring Static and Default Routes with SDM
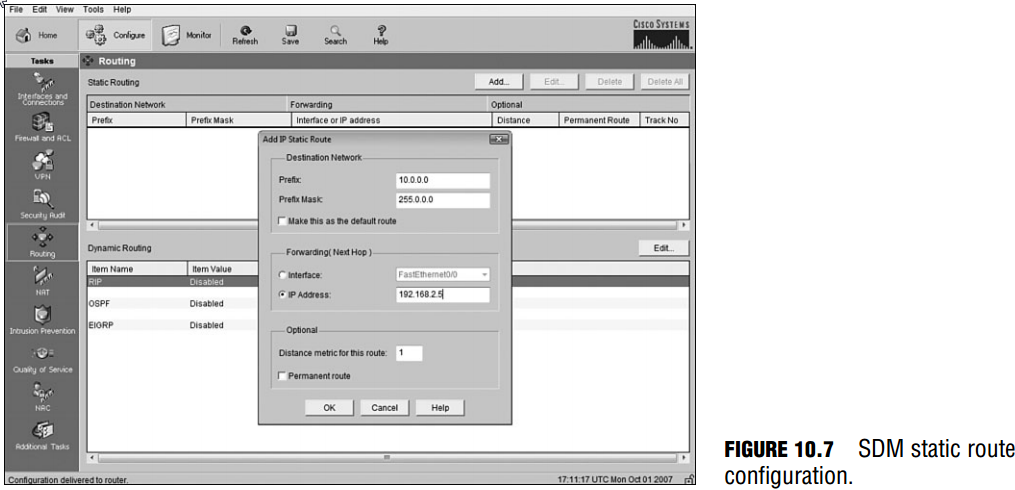
Using the Security Device Manager web-based configuration interface, you can easily configure static and default routes with just a few clicks of the mouse. Specifically, from the Configure screen, select the Routing task to display routing configuration options. At the top of the screen shown in Figure 10.7 is a section dedicated to Static Routing. Here, when you click the Add button, a pop-up window displays the parameters that you can configure for static or default routes.
In the pop-up window, you specify the destination network and subnet mask, as you did for the IOS CLI command. The next hop defaults to a drop-down box that lists the interfaces, but you can select the IP Address option and specify the next-hop address. Also notice that there is a checkbox to make this route a default route, as well as a checkbox to make this a permanent
static route entry. If you wanted to make this route a floating route, you could also put the distance metric for this route to an administrative distance value other than 1. After you click the OK button, the route is added to the running configuration of the IOS.

